Ask the maker filled request 2 of ?
Aug. 11th, 2014 11:26 pmAsk the maker fill for: ![[livejournal.com profile]](https://www.dreamwidth.org/img/external/lj-userinfo.gif) alghuls & reebeecaa.
alghuls & reebeecaa.
Everything is under spoiler cuts. If anything isn't clear, feel free to ask questions! :D

Here's the cap we will be working with. I started the base editing at 200x200 because I will be using topaz clean at one point or another and it picks up details better when a larger canvas for some reason so if you decide to use topaz, keep it a larger size so it will turn out right.
For this tutorial though I'll be working with the 100x100 psd I have so some places I might have to guess what I did. :P
We'll start off by getting the base lightened up and colored a bit.
Crop your cap like this

Also, this is going to be pretty large with 30+ layers so I recommend sorting the layers into groups so it's easier to see where you're at (like base coloring layers in one and overall coloring/texture layers in another). Not necessary though!
Copy your base and sharpen to your liking.
Create a Levels layer and change the settings to 11, 1.42, 230.
Create a Brightness/Contrast layer and change the settings to 16, 28.
Create a Photo Filter layer and set to cooling filter (82) the density is at 25% but I'm not sure if I set that or not... so yeah, moving on! Change the opacity to 28%

Create a new layer and merge (ctrl + shift + alt + e) and sharpen again.
Copy the first three adjustment layers and move them above the merged layer. Put them in a group and change the opacity to 36%.

Now comes the topaz. I don't save any of my settings I just hit the random button til I get what I'm looking for. Which is just a smoothing and bringing out details look, so it's very little and not highly noticeable usually but for this I'm trying to clean up my base some from sharp edges and the topaz works well. My results look like this

But you can just skip this part totally if you want.
Create another layer, merge and sharpen again but not very much.
Create a Levels layer and change the settings to, 5, 1.00, 235.
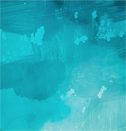
Create a color fill layer with this blue #aeedf0. Unselect it and create a new layer and merge again. Add a layer mask and cut Leia out of the background. Now we're going to jump ahead and add in textures. It's kind of out of order because I added these next textures after I did a bunch of other stuff.
You'll need this texture (by sodamnreckless). Position it like so and then set to Screen at 57%.
 >
> 
The next texture I'm not sure what it's part of as only a small piece is visible so I guess it can be skipped. Unless you can find something similar of course!

For the next one you'll need this texture (unkown maker. from tumblr I think!). This is scaled down and you'll be using the top part of it like this
 >
> 
Once you get that done you're going to go back to the masked layer of Leia and erase the bottom so it blends in with the wavy lines of the painted texture

Now we move on into the coloring layers
We're going to start off by coloring her hair. Use this color #955e36 and set it to Overlay at 59%
Then the part of her face visible use this color #d194aa set it to Overlay at 31%

Create a Color Balance layer and erase from everything but her hair. Set the layer to Color. Change the colors in midtones to +8, +15, -26.
Create a Hue/Saturation layer, set to color. Set saturation to +18.

Take this texture that I have literally no idea where it's from and paste it into a new layer and move it around so it's like this

Set to Exclusion at 22%
Next get this texture (by![[livejournal.com profile]](https://www.dreamwidth.org/img/external/lj-community.gif) midnight_road) that I've blurred to heck so it looks like this which now that I think of it, should use instead of the original. :D
midnight_road) that I've blurred to heck so it looks like this which now that I think of it, should use instead of the original. :D
Set to Screen at 79%
Make a Brightness/Contrast layer and set the contrast to 25
Create a Levels layer and erase from the paint texture only. Change the settings to 20, 1.00, 255

Create a new layer and get this this texture (bymidnight_road) that I've again, blurred the heck out of. Set to Screen at 60%
Create a new layer and merge (ctrl + shift + alt + e). Then go to Filter > Noise > Add Noise and mine is always set at 4 so for this just put it there. Do not select monochromatic. Erase Leia and the blue texture on the bottom. Change the Opacity to 44%.
Make a Brightness/Contrast layer and change brightness to -2 and contrast 32

Create a new layer and fill it with black. Erase like below and then set to Soft Light at 43%
 >
> 
Create a new layer and paste this texture in and adjust the size til it looks like below, erase anything that's on Leia and set the layer to Screen
 >
> 
Create a new layer and paste this texture (maker unknown) in and set to Screen at 66%
Create one more layer and taking an off white color make a blob in the upper right corner with a large soft brush and blur it with gaussian blur to fade it out even more. Set to Soft Light.
Flatten, save, and you're done!
~~~~

You'll need this cap (I don't think is the actually the specific cap I used but it's close), Topaz Clean and paintstroke brushes of kinds like these. I get all mine from deviantart but since I have so many I cannot remember which particular set I used but if you get some that look similar to what I said you would need, it should come out fine!
Crop, lighten and sharpen til you get something similar to this,

Next we'll be using those brushes and doing a lot of masking and erasing.
First color we're using is this blue #2490b4 set to Vivid Light. I first used a thick brush then added a mask and used a 'thin' brush (I'm not explaining this well at all, so hopefully the pictures will explain it better) to erase it a bit so it looks like the second picture


This is pretty much how I'll do all the painted layers. It's pretty time consuming so I'm going to tell you to remember this first one above and just keep repeating the steps so this doesn't turn into a huge tutorial. Oh, and every layer will be set to Vivid Light unless overwise stated!
Now we're using a brighter blue #16b4d6, painted over the same spot and do the same as in step one!

Create a new layer and brush with this orange #c46625

Create a new layer and paint over most of the right bottom side of the icon with #9c24b2 like so then erase.


Create a new layer and use this yellow #d4d616 and set to Overlay

Take another orangey color #d4981a and paint over the bottom left
 >>
>> 
Now with a rather gross looking yellow/orange color #c8a024 this time over the top left edge
 >>
>> 
This next part you're going to use a small brush mine was from a hair pack since we'll be painting over her hair. These are the colors used, be3fd2, 2aabc4, a9b627, and 53af84. I zoomed in on this so you could get a better look at how I painted it,

So get something similar, it's mostly going to blend in so don't worry too much about it. Set to Overlay
Copy the last layer 2 times. Set the first one to Vivid Light at 18% and the second one to Color Dodge at 16%.

Create a Color Balance layer set to Color and erase from everything but her hair. Change the settings to this in midtones, +38, + 24, -36

Now we need to make it smoother and not so pixelated. Create a new layer and merge the current view into one (ctrl + shift + alt + e) and open Topaz Clean. I always use the random button so just do that until you get something like this
 >>
>> 
Think subtle! It needs to look like it doesn't have Topaz, just some rad painting skillz~ :P When you get something you like change the opacity to 76%.
Change the color of her earring to a bright orange and pink. Set to Multiply.

Create a Huse/Saturation layer and set to Color. Change saturation to +13.

Make a Color Balance layer and erase from everything except the eye area like this

Change to Color and the settings in midtones to -30, - 13, +31

Create a Levels layer and change the settings to 0, 1.00, 244

Create a new layer and in the bottom right corner, paint with a large soft brush with black to fill it in

Make a new layer and merge everything into it (crtl + shift + alt + e). Then sharpen it a bit, and blur some sharp spots.

Add this texture (maker unknown) and set to Screen at 30%
This next step is a texture that I have no idea where it's from as most of it's erased. (I should probably start writing down in the layers where these are from.... D:) Soo you'll need this part of a texture set to Vivid Light at 38%
 >>
>> 
Take this texture by vetica. Rotate 90° then flip vertical. Set to Soft Light at 70%.

Create a Brightness/Contrast layer and erase from the upper left side like so

Set brightness to 7 and contrast 14.
Create a Levels layer and erase from the top like this

Change the settings to 8, 1.11, 235

Add this texture and set to Linear Dodge at 79%.
Now we're going to do some highlighting. So create a new layer and with a small soft brush paint over her face in these places (zoomed in because the white kind of blends in)

Then set to Overlay.
Final layer is a Vibrance layer set it to Color then change the settings to +30 and +4.
Then rotate 90° if you wish.
Flatten, save, and you're done!
Everything is under spoiler cuts. If anything isn't clear, feel free to ask questions! :D
Here's the cap we will be working with. I started the base editing at 200x200 because I will be using topaz clean at one point or another and it picks up details better when a larger canvas for some reason so if you decide to use topaz, keep it a larger size so it will turn out right.
For this tutorial though I'll be working with the 100x100 psd I have so some places I might have to guess what I did. :P
We'll start off by getting the base lightened up and colored a bit.
Crop your cap like this
Also, this is going to be pretty large with 30+ layers so I recommend sorting the layers into groups so it's easier to see where you're at (like base coloring layers in one and overall coloring/texture layers in another). Not necessary though!
Copy your base and sharpen to your liking.
Create a Levels layer and change the settings to 11, 1.42, 230.
Create a Brightness/Contrast layer and change the settings to 16, 28.
Create a Photo Filter layer and set to cooling filter (82) the density is at 25% but I'm not sure if I set that or not... so yeah, moving on! Change the opacity to 28%
Create a new layer and merge (ctrl + shift + alt + e) and sharpen again.
Copy the first three adjustment layers and move them above the merged layer. Put them in a group and change the opacity to 36%.
Now comes the topaz. I don't save any of my settings I just hit the random button til I get what I'm looking for. Which is just a smoothing and bringing out details look, so it's very little and not highly noticeable usually but for this I'm trying to clean up my base some from sharp edges and the topaz works well. My results look like this
But you can just skip this part totally if you want.
Create another layer, merge and sharpen again but not very much.
Create a Levels layer and change the settings to, 5, 1.00, 235.
Create a color fill layer with this blue #aeedf0. Unselect it and create a new layer and merge again. Add a layer mask and cut Leia out of the background. Now we're going to jump ahead and add in textures. It's kind of out of order because I added these next textures after I did a bunch of other stuff.
You'll need this texture (by sodamnreckless). Position it like so and then set to Screen at 57%.
The next texture I'm not sure what it's part of as only a small piece is visible so I guess it can be skipped. Unless you can find something similar of course!
For the next one you'll need this texture (unkown maker. from tumblr I think!). This is scaled down and you'll be using the top part of it like this
Once you get that done you're going to go back to the masked layer of Leia and erase the bottom so it blends in with the wavy lines of the painted texture
Now we move on into the coloring layers
We're going to start off by coloring her hair. Use this color #955e36 and set it to Overlay at 59%
Then the part of her face visible use this color #d194aa set it to Overlay at 31%
Create a Color Balance layer and erase from everything but her hair. Set the layer to Color. Change the colors in midtones to +8, +15, -26.
Create a Hue/Saturation layer, set to color. Set saturation to +18.
Take this texture that I have literally no idea where it's from and paste it into a new layer and move it around so it's like this
Set to Exclusion at 22%
Next get this texture (by
Set to Screen at 79%
Make a Brightness/Contrast layer and set the contrast to 25
Create a Levels layer and erase from the paint texture only. Change the settings to 20, 1.00, 255
Create a new layer and get this this texture (by
Create a new layer and merge (ctrl + shift + alt + e). Then go to Filter > Noise > Add Noise and mine is always set at 4 so for this just put it there. Do not select monochromatic. Erase Leia and the blue texture on the bottom. Change the Opacity to 44%.
Make a Brightness/Contrast layer and change brightness to -2 and contrast 32
Create a new layer and fill it with black. Erase like below and then set to Soft Light at 43%
Create a new layer and paste this texture in and adjust the size til it looks like below, erase anything that's on Leia and set the layer to Screen
Create a new layer and paste this texture (maker unknown) in and set to Screen at 66%
Create one more layer and taking an off white color make a blob in the upper right corner with a large soft brush and blur it with gaussian blur to fade it out even more. Set to Soft Light.
Flatten, save, and you're done!
~~~~
You'll need this cap (I don't think is the actually the specific cap I used but it's close), Topaz Clean and paintstroke brushes of kinds like these. I get all mine from deviantart but since I have so many I cannot remember which particular set I used but if you get some that look similar to what I said you would need, it should come out fine!
Crop, lighten and sharpen til you get something similar to this,
Next we'll be using those brushes and doing a lot of masking and erasing.
First color we're using is this blue #2490b4 set to Vivid Light. I first used a thick brush then added a mask and used a 'thin' brush (I'm not explaining this well at all, so hopefully the pictures will explain it better) to erase it a bit so it looks like the second picture
This is pretty much how I'll do all the painted layers. It's pretty time consuming so I'm going to tell you to remember this first one above and just keep repeating the steps so this doesn't turn into a huge tutorial. Oh, and every layer will be set to Vivid Light unless overwise stated!
Now we're using a brighter blue #16b4d6, painted over the same spot and do the same as in step one!
Create a new layer and brush with this orange #c46625
Create a new layer and paint over most of the right bottom side of the icon with #9c24b2 like so then erase.
Create a new layer and use this yellow #d4d616 and set to Overlay
Take another orangey color #d4981a and paint over the bottom left
Now with a rather gross looking yellow/orange color #c8a024 this time over the top left edge
This next part you're going to use a small brush mine was from a hair pack since we'll be painting over her hair. These are the colors used, be3fd2, 2aabc4, a9b627, and 53af84. I zoomed in on this so you could get a better look at how I painted it,
So get something similar, it's mostly going to blend in so don't worry too much about it. Set to Overlay
Copy the last layer 2 times. Set the first one to Vivid Light at 18% and the second one to Color Dodge at 16%.
Create a Color Balance layer set to Color and erase from everything but her hair. Change the settings to this in midtones, +38, + 24, -36
Now we need to make it smoother and not so pixelated. Create a new layer and merge the current view into one (ctrl + shift + alt + e) and open Topaz Clean. I always use the random button so just do that until you get something like this
Think subtle! It needs to look like it doesn't have Topaz, just some rad painting skillz~ :P When you get something you like change the opacity to 76%.
Change the color of her earring to a bright orange and pink. Set to Multiply.
Create a Huse/Saturation layer and set to Color. Change saturation to +13.
Make a Color Balance layer and erase from everything except the eye area like this
Change to Color and the settings in midtones to -30, - 13, +31
Create a Levels layer and change the settings to 0, 1.00, 244
Create a new layer and in the bottom right corner, paint with a large soft brush with black to fill it in
Make a new layer and merge everything into it (crtl + shift + alt + e). Then sharpen it a bit, and blur some sharp spots.
Add this texture (maker unknown) and set to Screen at 30%
This next step is a texture that I have no idea where it's from as most of it's erased. (I should probably start writing down in the layers where these are from.... D:) Soo you'll need this part of a texture set to Vivid Light at 38%
Take this texture by vetica. Rotate 90° then flip vertical. Set to Soft Light at 70%.
Create a Brightness/Contrast layer and erase from the upper left side like so
Set brightness to 7 and contrast 14.
Create a Levels layer and erase from the top like this
Change the settings to 8, 1.11, 235
Add this texture and set to Linear Dodge at 79%.
Now we're going to do some highlighting. So create a new layer and with a small soft brush paint over her face in these places (zoomed in because the white kind of blends in)
Then set to Overlay.
Final layer is a Vibrance layer set it to Color then change the settings to +30 and +4.
Then rotate 90° if you wish.
Flatten, save, and you're done!